
Introduction
WordPress is widely used as a CMS that makes building websites easy. In many cases, it is typically installed in the domain's root directory.
However, installing WordPress in the root directory generates numerous system files and folders, often cluttering server file management. In addition, because of WordPress's high popularity, sites hosted at the root directory tend to be frequent targets of security attacks.
This article explains how to install WordPress in a subdirectory while still serving the site to users from the root URL.
Benefits of installing WordPress in a subdirectory
Here is a summary of the benefits of installing WordPress in a subdirectory.
1. Simplified file management
Installing WordPress generates numerous system files on the server, including core files, themes, and plugins. Placing these directly in the root directory makes management difficult in scenarios such as:
- Running multiple WordPress sites
- Running WordPress alongside other systems (e.g., e-commerce platforms, internal systems)
- Coexisting with static HTML pages
2. Enhanced security
Because WordPress is the world's most widely used CMS, it has the drawback of being an easy target for security attacks.
Many attacks assume that WordPress is installed at the domain root.
Installing it in a subdirectory helps reduce security risks.
When doing so, it is best to avoid predictable subdirectory names like "wordpress" or "wp".
While this alone will not prevent every threat, it serves as an effective safeguard.
How to change the URL of a WordPress site installed in a subdirectory
Now, let's walk through the exact steps for changing the configuration. The following explanation assumes that WordPress is installed in https://abcd.com/wp.
1. Change the URL in the WordPress admin screen
Log in to the WordPress admin screen, navigate to "Settings" → "General", and change the Site Address (URL) to the root URL (e.g., https://abcd.com). Leave the WordPress Address (URL) set to the directory where WordPress is installed. 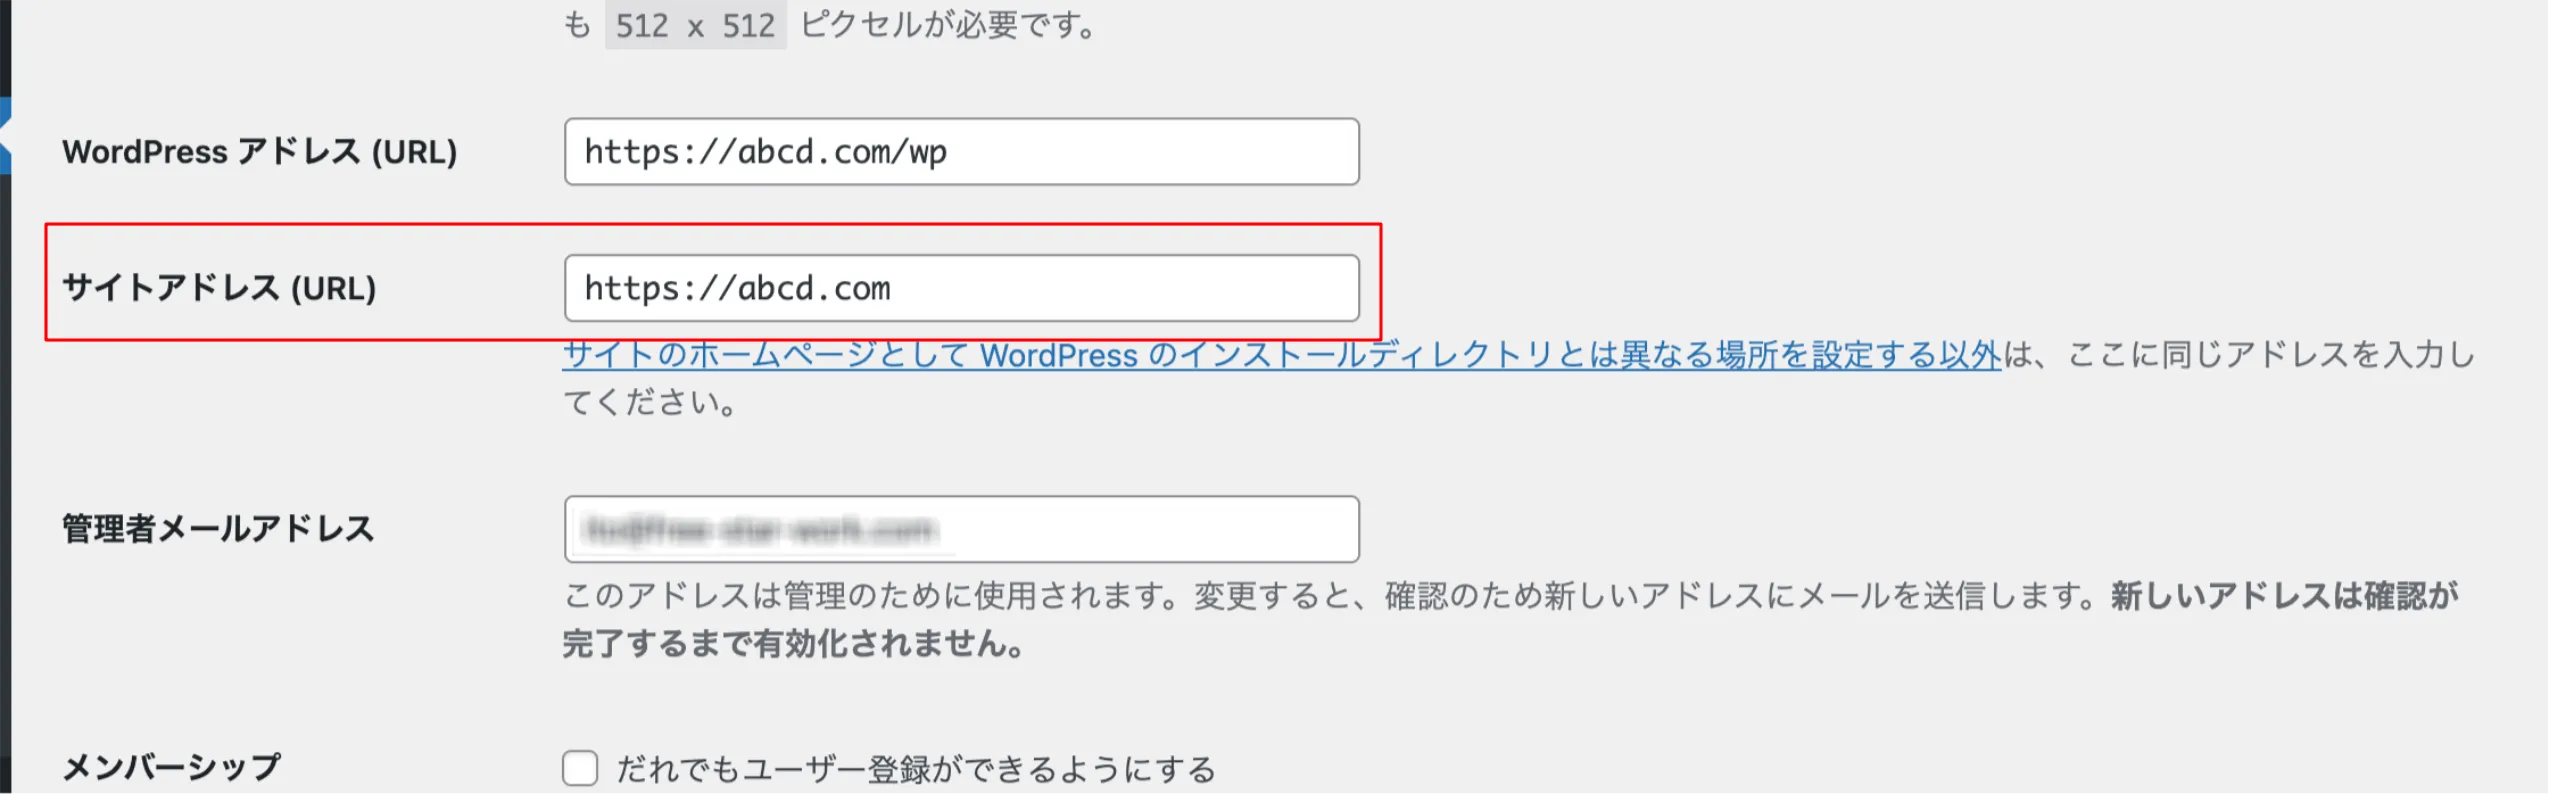 Once you have updated the settings, save them by clicking "Save Changes".
2. Copy files to the root directory
Copy the index.php and .htaccess files located directly inside the subdirectory to the root directory.
3. Edit the index.php file
Open the index.php file and update the path to wp-blog-header.php. 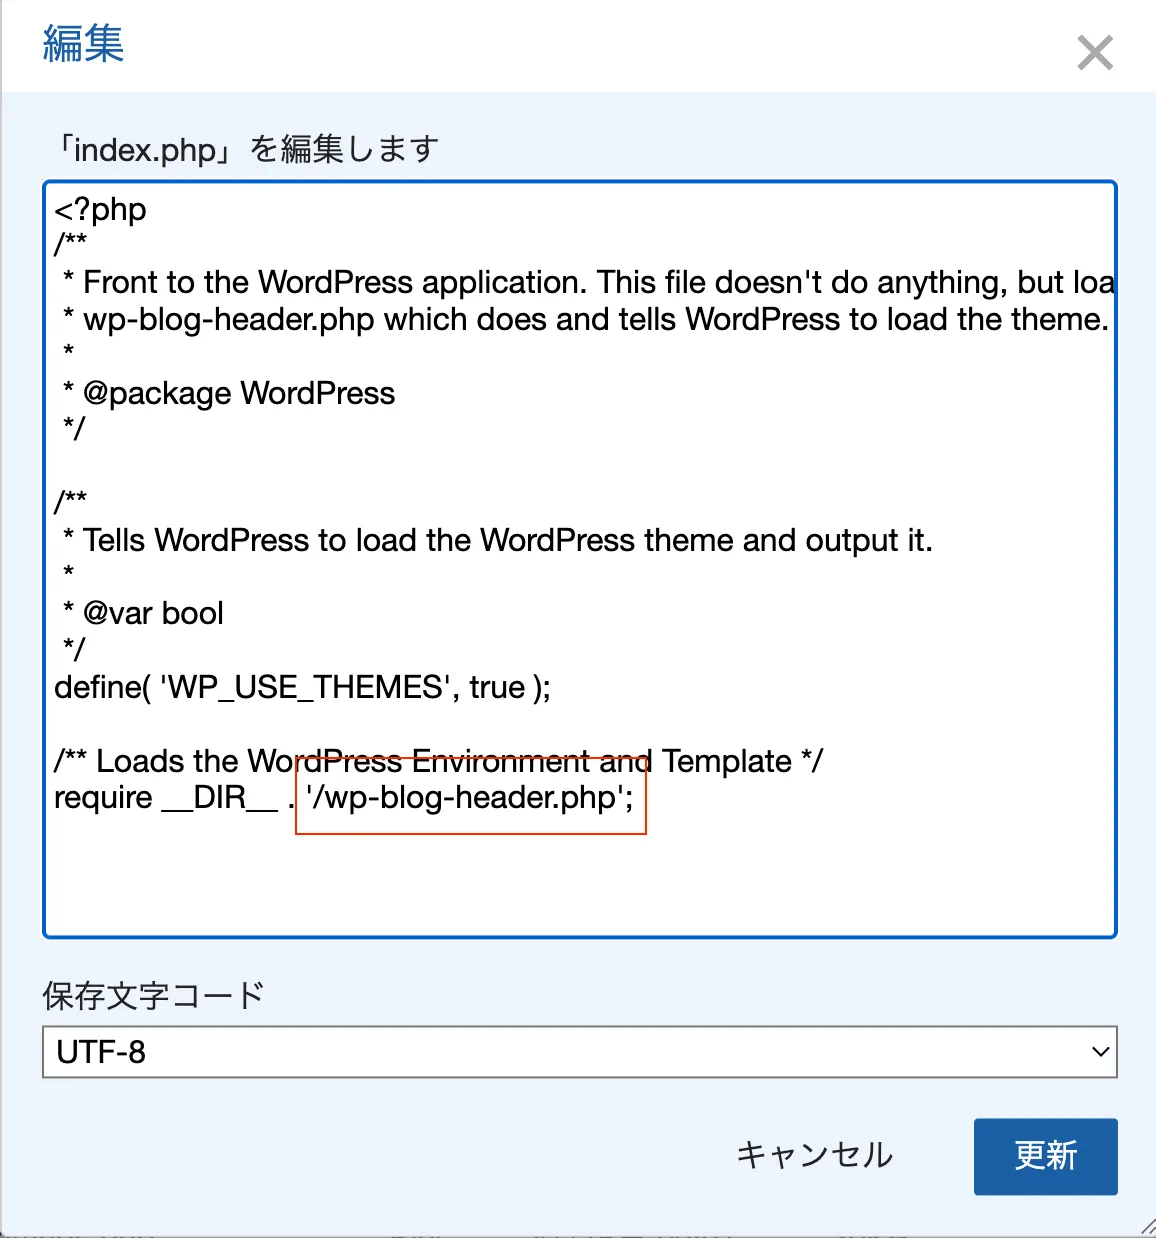 Prepend the subdirectory name before
 wp-blog-header.php.
require( dirname( __FILE__ ) . '/wp/wp-blog-header.php' );4. Edit the .htaccess file in the subdirectory
Open the .htaccess file saved directly inside the subdirectory, and remove the subdirectory name from the RewriteBase and RewriteRule paths. 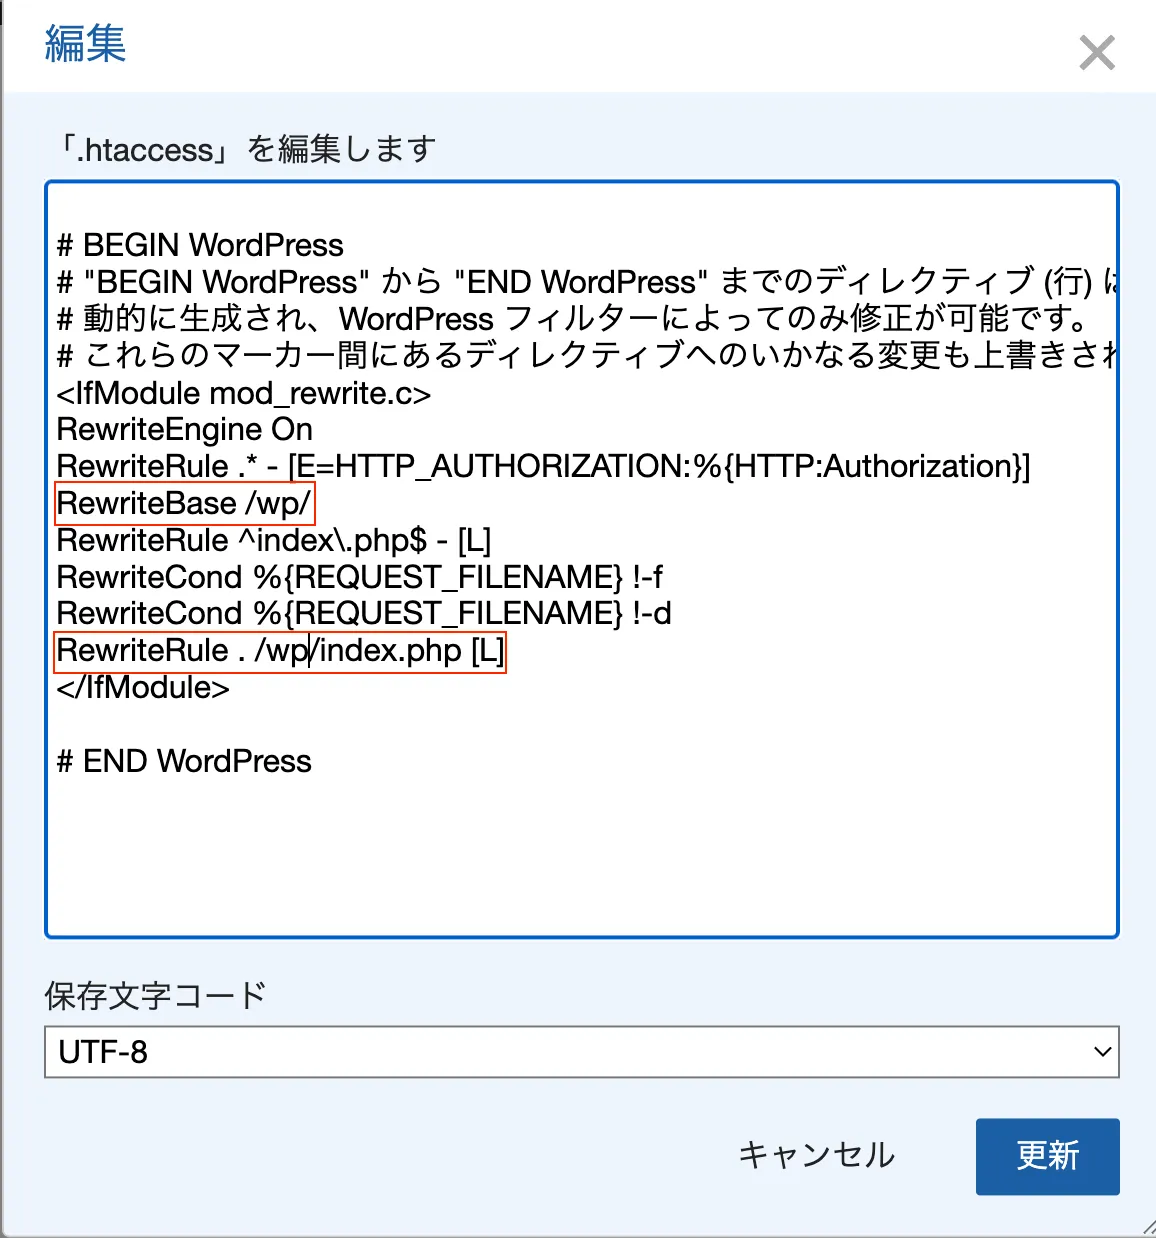 Remove the subdirectory name from this section.
RewriteBase /
RewriteRule . /index.php [L]
5. Verify site display
Once you have completed the steps above, access the site to verify. If the site loads without any issues, the configuration is complete.
Conclusion
This article introduced how to change the URL for a WordPress site installed in a subdirectory. Although it requires a few extra steps, it offers clear advantages in file management and security, making it a technique well worth adopting.